Monetization Boot Camp Day 3: Ad Programs & Placement
Howdy Bloggers!
We’re already at day three of our boot camp! Thus far, we’ve taught you to produce quality content and some basic concepts in Day One, and all about affiliate programs in Day Two. Day Three is all about ads, ad placement, product promotion, and additional important terminology.
There are many ways to participate in ad programs, and even more ways to place them on your website. We’re going to cover some of the most popular programs relevant to our customers, but if you have questions about programs not covered here, please feel free to leave a comment or send us an email via our Contact Form.
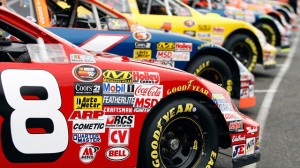 First, let’s talk about ad placement and volume. As we mentioned previously, many readers may be turned off by too many ads, particularly if they are animated or have sound embedded. Do you want your blog to look like a NASCAR vehicle? Most people probably do not. However, it’s easy to slide down a slope into NASCAR-ville. We start with two, and then think, “what the heck, what’s one more?” Then we take a good, hard look and think, “gosh, there’s room for another one Right There.”
 We have to remember the focus of our blog – is it to earn money, to share information, or is it something else? Pick your ad volume based on that question.
We can’t promote our links or products if we don’t have readers, so we must be judicious with our ads, placing them in the areas most likely to be not only noticed, but clicked. Screen real estate is a precious commodity – we only have so much room per page, and we can’t fill it all up with advertisements. Thus, we must pick and choose carefully.
There’s a nice graphic from Google about effective ad placement, with some discussion, on this page.
SIDEBARS
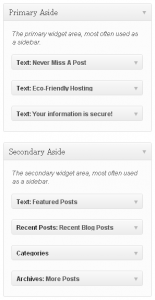 By far, the most common area to place ads (“ads” in this context includes affiliate links and images) is in the sidebar. Most themes allow for easy sidebar widget customization. Some themes allow for multiple sidebars (left, right, left inner, right inner) which can be very nice if used well, and overwhelming if used poorly. Effective web design will be covered in a future boot camp, but for now, bear in mind different themes offer different options for widget placement.
The usual configuration for a blog is to have the sidebar to the right of the content. Many bloggers (ourselves included) feel this is a less-invasive place for non-content items for readers of languages reading from left to right. Readers’ eyes will first be drawn to our content on the left, and they will be able to read more naturally if they don’t have to scan over items that are not the main content on the left side.
However.
If an important goal is to have people click on ad and affiliate links, it may not be a bad idea to have their eyes stumble over your links on the left-hand side of the blog. It may be too easy to automatically overlook a right-side sidebar.
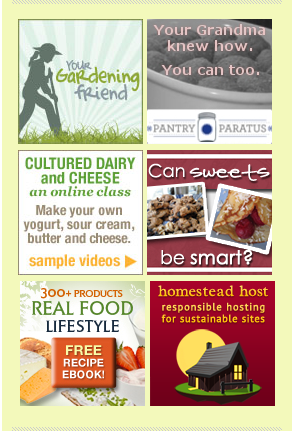
Some themes will allow easy scaling of the width of the sidebar – others will require a knowledge of CSS (Cascading Style Sheets, the engine driving themes and templates) to alter. Select ads that fit well within your sidebar parameters – ads that are too wide will break the smooth appearance of your widgets and detract from your site. Conversely, ads that are too narrow may be wasting space better utilized in another manner. Here are some examples of ads which work well, in our opinion (not all ads shown represent affiliate links or particular programs; we’re focusing on the placement.)
Jill at The Prairie Homestead uses two columns of narrower buttons to double the number of ads she can place in one area:
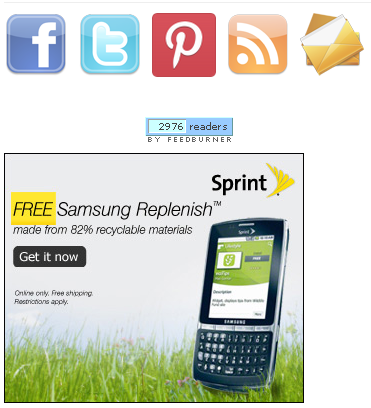
Adrienne at Whole New Mom uses the full width of her sidebar for some ads, and places the topmost one prominently, right under her social media icons:
AnnMarie of CheeseSlave clearly notes her ads are products she recommends (Oh neat – This one is for the local farm where Erin’s family buys their meat!)
Kimi of The Nourishing Gourmet uses a mix of single- and double-wide ads:
One stylistic note: We find ads which are centered within a given space to be most attractive in the majority of cases. If asymmetry is your thing, let your flag fly; otherwise, it’s worth a few extra seconds to toss in those <center></center> tags.
Although the most common site for ads, the sidebar is not the only place we can put them.
Headers
The term “header” can be vague. Generally, the header area means the overarching header of the site (the top red area of Black Chicken Host, for example;) however, some folks use the term to describe a post-specific header (an area just above or just below the title of the post on its own page.) Both can be used for ad placement with the right theme (or CSS skills,) and are good for leaderboard-type ads (the wide, narrow kind.)
Adrienne places one ad in her overarching site header (we had to shrink it to fit it here, but click through to her site for the full shebang:)
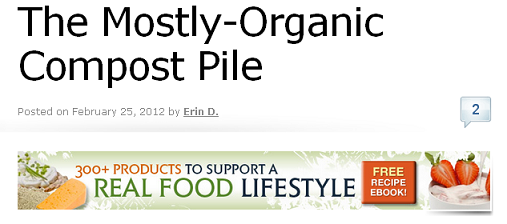
Homestead Geek places one ad in the individual post headers:
Both spaces will draw the eye and gather good attention. We feel the individual post headers are the better area of the two for a number of reasons, but it will all depend upon what you like for your particular site. The main reason we like post headers better is because after visiting your site once or twice, people know what your main header looks like – they know your site’s name, your logo, and they know your tagline – they may stop looking up that far.
Most readers will, however, read a post’s title, and then their eyes will naturally flow over the ad directly beneath it. If your theme does not allow for placing widget into the post headers or footers, Ad Injection will do the trick in most WordPress cases. Additionally, some themes have extensive, free community support and websites, like the Thesis Framework, which may help you to learn how to insert ads.
Footers
As you might guess, this is the area at the bottom of the website. Some themes allow for widget placement here, some allow for several columns’ worth, some allow none. There is the overarching website footer area, and there is the post-specific footer area.
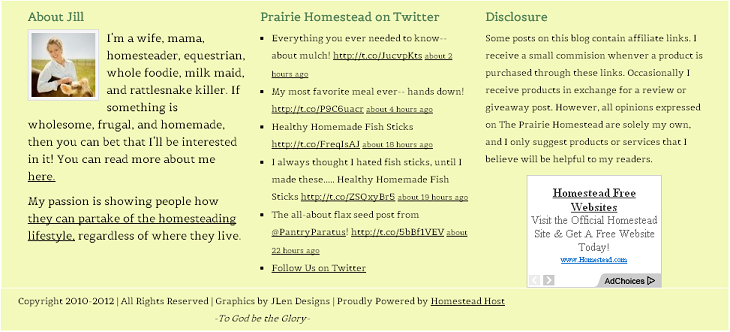
We’ll go back to Jill for an example of a very informative footer (shrunk to fit:)
Jill places information in the footer people might want to know after reading any of her posts, especially if they are new readers. She also uses a small portion of the space for a modest Google ad.
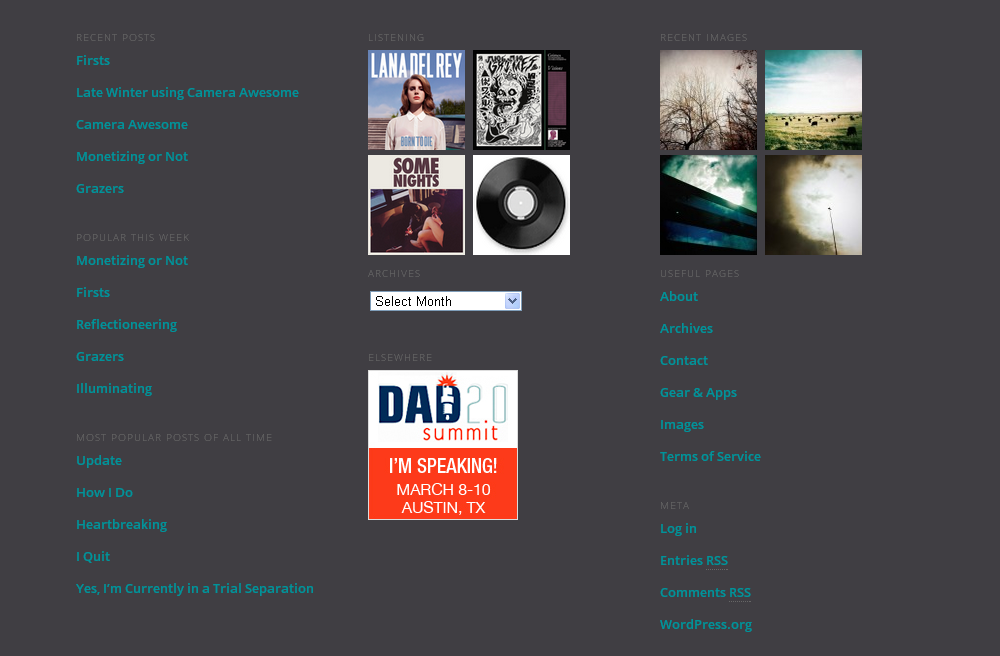
Jon of Blurbomat takes it a step further, incorporating recent posts, images, what he’s listening to, and more:
There are some good options for ad placement in website footers. If you have multiple columns in your footer, you can use squares (boxes or buttons) or skyscrapers (the tall, skinny kind.) If you have one wide column, you can use leaderboards, or a series of narrower images.
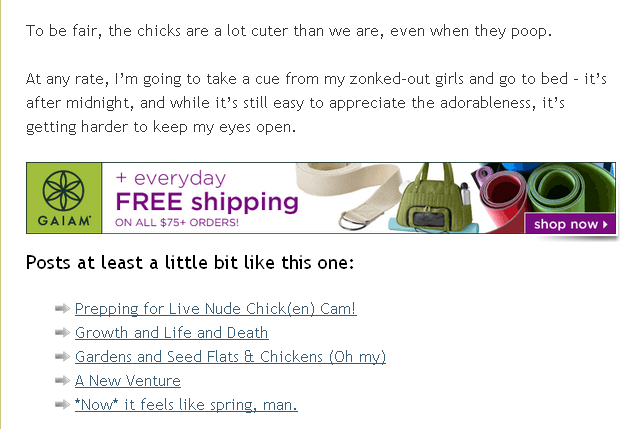
There is also the post-specific footer, which is like the post-specific header, but at the bottom of the page, beneath the body of your post. It’s a good place for leaderboard-type ads, like this:
Ad Injection will also allow you to place ads within the body of your posts themselves – but we’ll cover that in a future Ad-Injection-specific post.
You can also place ads in your RSS feed using FeedBurner (another tutorial in the future.)
What have we learned thus far? The sidebar, the post headers and footers are the most common places to put advertisements on blogs. We’ve seen some good examples of each.
With all of these clicks you are hopefully gathering with your ads, how do you try to retain your readers’ attention and not lose them completely to the site to which you’re linking? Great question! The best answer is to open all outbound links in another window or tab. It’s very easy to code this directly into the “a href” part of your code, or you can install a WP plugin called Open External Links in New Window. This plugin will not always work for javascript-based code or in widgets, but it does save time for external links within posts. You can also read a tutorial on how to make individual links open in new windows or tabs (in a nutshell, you use target=”_blank” in your code.)
Let’s get into some ad-specific terminology briefly.
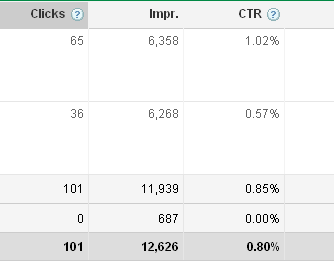
Impressions: The number of times an ad was displayed on your site, irrespective of clicks.
Click-Through-Rate (CTR:) The number of clicks your ad received divided by the number of impressions – Clicks/Impressions X 100 = CTR
Conversions: The number of people who purchased something after clicking on your ad.
Conversion Rate: The percentage of conversions for your site. Typically, this is calculated with the formula: Conversions/Impressions X 100 = Conversion Rate (2% or higher is good)
A lot of impressions means you’re getting good traffic on your site – but we need to turn those impressions into conversions. CheeseSlave did a great piece today on this very thing, so we’re not going to reinvent the wheel here. AnnMarie knows wherefrom she speaks, making about $1500/month from Amazon alone! We recommend both her blogs, CheeseSlave and Social Media Strategy.
What she doesn’t go into great detail about is the power of social networking. Most of us are familiar with Google+, Facebook, and Twitter, and know posting our links there will get some volume of traffic to our sites. What some of you may not know is there are other venues.
 Reddit houses an insanely powerful group of people – a high ranking on Reddit can bring absolutely staggering traffic to your site. We’ll talk more in the future about Reddit and its pros and cons, but in a nutshell here, find a sub-Reddit (eg, /r/Homestead) that’s appropriate for your post, and put it on up there. Some sub-Reddits can be brutally critical, however, so be prepared for trolls and criticism. However, if more people like your link than not, be prepared for a nice influx of readers. As with other venues, be civil, even in the face of asshattery and jerks making rude comments. Generally, posts with solid relevant content will do better than brief, uninformative ones. Many Reddit users will not be shy about criticizing something they do not like, so it’s best to have a thick skin before posting. Conversely, having a post be really well-received by the Reddit community can be quite a thrill.
 Of particular note lately is Pinterest. When we first discovered this site, we were really excited about it – what great sharing potential! It’s kind of like an online community scrapbook in many ways. We put up a little “Pin It” button on all of our pages, and populated personal Pinterest pages.
This site has fantastic potential for affiliate linking, but it comes with a hefty price; in fact, we are likely going to block Pinterest from accessing the Black Chicken Host site at all. Why? Because any content posted to Pinterest, according to their Terms of Service, is legally able to be sold by Pinterest. Pinterest could devastate personal information rights and copyrights. You can read more about this in an article on the Bill of Rights for All Creative People website.
An insidious element of the Pinterest Terms of Service is it doesn’t matter who posted the image or content to Pinterest – someone else could post your content and surrender your rights to your own work. We suspect this will be challenged in a court of law (perhaps sooner than later,) but in the meantime, we advise playing it safe and not posting copyrighted material to Pinterest.
That said, should you decide to utilize Pinterest, here’s how it can amplify your earnings: When you post a link to Pinterest, make sure it’s your unique affiliate URL. When others repin your post, it will show your affiliate URL to all of that person’s followers. If it’s reposted from that person, another level of followers is exposed to your affiliate URL, thereby increasing the potential for conversions.
When using Pinterest, though, be sure to respect the rights of others and don’t post copyrighted materials – because Pinterest does not respect rights currently. On a personal note, we find their blatant disregard of information property rights nauseating – and this from a group of nerds who opposed SOPA and PIPA wholeheartedly!
 Finally, we’d like to mention another almost counter-intuitive means of earning money through ad and affilliate programs – buy ads for your ads! This is a little like the “Yo, Dawg” meme, we know, but it can work under the right circumstances. “Buying ads for your ads” boils down to purchasing ad space (via Google AdWords or elsewhere) and putting your affiliate links in those ads. If you can earn more money from conversions than you spent on the ads, you win! AdWords allows spending limits to be put into place, which is nice for those who do not have $TEXAS to spend on their advertising budget – you won’t wake up one morning to discover you racked up $5,000 in ad bills overnight.
Ad Programs
We have arrived at the final section of today’s Boot Camp – actual ad programs.
Our Black Chicken Host customers are predominantly folks interested in homesteading, sustainability, whole foods, frugality and other related subjects. Thus, the ad networks we’re mentioning here cater to that group of folks.
Please note: We do not endorse any of these programs – the information presented is for instructional purposes only.
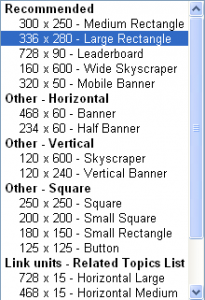 Perhaps the most popular ad program across all demographics is Google’s AdSense. We mentioned this program in Days One and Two, but here are the basics again: Nearly anyone may sign up for AdSense; there are a wide variety of ad sizes and shapes to fit into any website; you may block broad categories of ads, and particular companies; it is primarily a pay-per-click program.
You may have up to three AdSense ads on any given page – more than that, and Google will disallow number 4 and up. Outside of the categories and companies you have blocked, no have no say in which ads appear on your site.
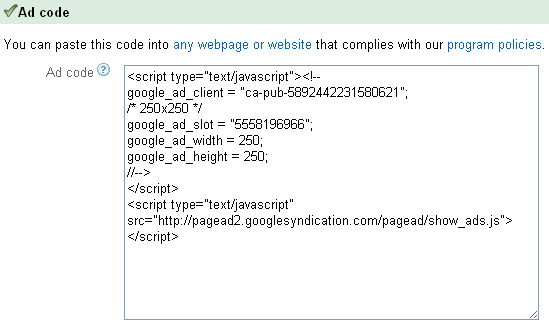
There are a number of WordPress plugins designed to make AdSense easier. We like AdSense Revenue Sharing and WP Google Ad Manager. These plugins allow insertion of Google AdSense code in quick and easy ways. That said, no plugins are necessary to use AdSense – you can simply copy and paste the code into a text widget. The code will look something like this:
This code is called “javascript,” and for security reasons is not easily inserted into the body of posts without a plugin. However, widgets will do the trick for your widget areas.
Google has a relatively decent support section for AdSense, but it is not always crystal-clear. Please feel free to ask us any questions you may encounter if you don’t find the answer on AdSense’s site; we’ll do our best to answer them.
Another popular program is the Foodie Blogroll. This program requires all applications to be approved, and the site featuring their ads must meet their criteria. The blog must be:
- Be at least 2 months old
- 75% food related
- Public
- Updated twice a month
- Open to reader comments
- Free of adult content
- Hosted by a service that supports ads
- Free of profanity
- Able to put ads above the fold
- Receive at least 2500 page views per month ***
Basic Guidelines for Content Published in the SIP (Sharing Incentive Program)
- All recipes must adhere to Weston A. Price guidelines for real food and traditional food preperation methods (i.e. soaking, fermenting, sprouting). Nothing refined or processed, etc.
- All recipes must include a photo of the prepared food from the recipe. Users want to see what it looks like! Make them want to make your recipe. The prettier the photo, the better, though we don’t expect professional quality photos, a shot with your digital camera is just fine.
- Be sure that a recipe has not already been published with the same title. (i.e. If there is already a “Sprouted Cornbread” recipe, give yours a new title, such as “Homemade Sprouted Honey Cornbread.”) Recipes with 3 or more words in the title are preferred.
Requirements for applying for the SIP
- Create a free account on Eat Nourishing. Register
- The email address on your Eat Nourishing profile must be associated with your Paypal email. We only pay out royalties using Paypal at this time.
- Must be at least 18 years of age .
- For tax purposes, only US citizens may apply at this time.
To learn more, read the SIP FAQ and other SIP Benefits.
Another item to bear in mind when using ad networks which must make external calls (meaning they pull images or content from third-party servers located elsewhere;) they can really slow down your load times! For many themes, this won’t be a problem, as the rest of your site will display correctly without the ad content. However, for some, the entire page may have to wait until the ad content is served before it will display. In this day of short attention spans, that can mean losing readers. Try to select ad programs with a good reputation for serving content swiftly. Also, Google’s algorithm is reported to measure your site’s load time and figure that into your SEO (Search Engine Optimization) score – slower load times means lower ranking in Google searches. Again, it all comes down to balance; we each have to find the right mixture of content, images and advertisements to suit our personal goals.
Are your eyes bleeding yet? We know these camp sessions are long! However, if we didn’t go into this length and instead broke the posts up across several days, we’d be doing this boot camp for a month, and boy howdy, we have a lot more stuff we want to share with you. If you couldn’t get through it in one sitting, you are always welcome to refer back to the courses in the future.
As always, we welcome your comments, suggestions, and questions.
Check out the rest of this Bootcamp Series here:
Day 1: Basic Training – Some of the methods you can use to monetize your blog, how they compare and contrast, and how not to be a total sleazeball
Day 2: Affiliate Programs – Why it’s a good idea to be selective, and how to participate
Day 3: Ad Programs – How to determine how many ads are right for you (aka: Do you want your site to look like a NASCAR vehicle?)
Day 4: Social Networking – How to leverage Google+, Facebook, Twitter, Pinterest and more
Day 5: Advanced Topics – Advanced Topics, and Summing It All Up
2 thoughts on “Monetization Boot Camp Day 3: Ad Programs & Placement”
Leave a Reply






Excellent details Erin! You gave me tons to think about.
Thanks, Millie! It’s such a complex subject, it seems like we’re not getting every last detail in there we’d like – but we can add another in-depth camp in the future. 🙂